
A few loose paint chips can make an otherwise well-kept room, storefront, or exterior look neglected. More importantly, peeling paint is usually a signal that something beneath the finish needs attention. Knowing how to repair peeling paint means addressing moisture, poor adhesion, or surface damage first – not simply covering the problem with a fresh coat.
A lasting repair takes a little more preparation than a quick touchup, but it protects the surface, improves the appearance of the property, and helps prevent the same failure from returning next season.
Start by Finding Out Why the Paint Is Peeling
Paint peels when it loses its bond with the surface underneath. Sometimes the cause is straightforward, such as painting over dust, glossy trim, or damp wood. Other times, peeling points to a building issue that should be corrected before any painting begins.
On interior walls and ceilings, look for plumbing leaks, condensation, poor bathroom ventilation, or moisture around windows. A peeling bathroom ceiling, for example, often needs better exhaust ventilation as well as a repair and repaint. If the drywall feels soft, stained, or swollen, the water source must be resolved before the area is patched.
On exterior surfaces, Denver-area homes face wide temperature swings, intense sun, snow, and occasional hail. Water can work behind paint through cracked caulk, failed gutters, damaged flashing, open joints, or deteriorated siding and trim. Paint may also fail where sprinklers repeatedly wet a wall or where landscaping holds moisture against the home.
If paint is peeling across large sections of an exterior, along with soft wood or visible gaps, repainting alone is not the right fix. Replacing failed trim, repairing siding, improving drainage, or installing gutter components may be necessary to create a surface that will hold paint.
How to Repair Peeling Paint Step by Step
Once the underlying issue is fixed and the area is dry, the actual paint repair can begin. The goal is to remove every weak edge, create a smooth transition to sound paint, and rebuild the coating system with compatible products.
Protect the work area and check for lead paint
Move furniture away from the work area and cover floors, landscaping, and nearby surfaces with drop cloths. Wear safety glasses and a properly fitted dust mask or respirator while scraping and sanding.
For homes built before 1978, assume older layers may contain lead unless testing shows otherwise. Lead paint dust requires specific containment and cleanup practices. Avoid aggressive dry sanding, power sanding without proper collection, or using a heat gun on suspected lead paint. In that situation, hiring a qualified professional is the safer choice.
Remove loose and failing paint
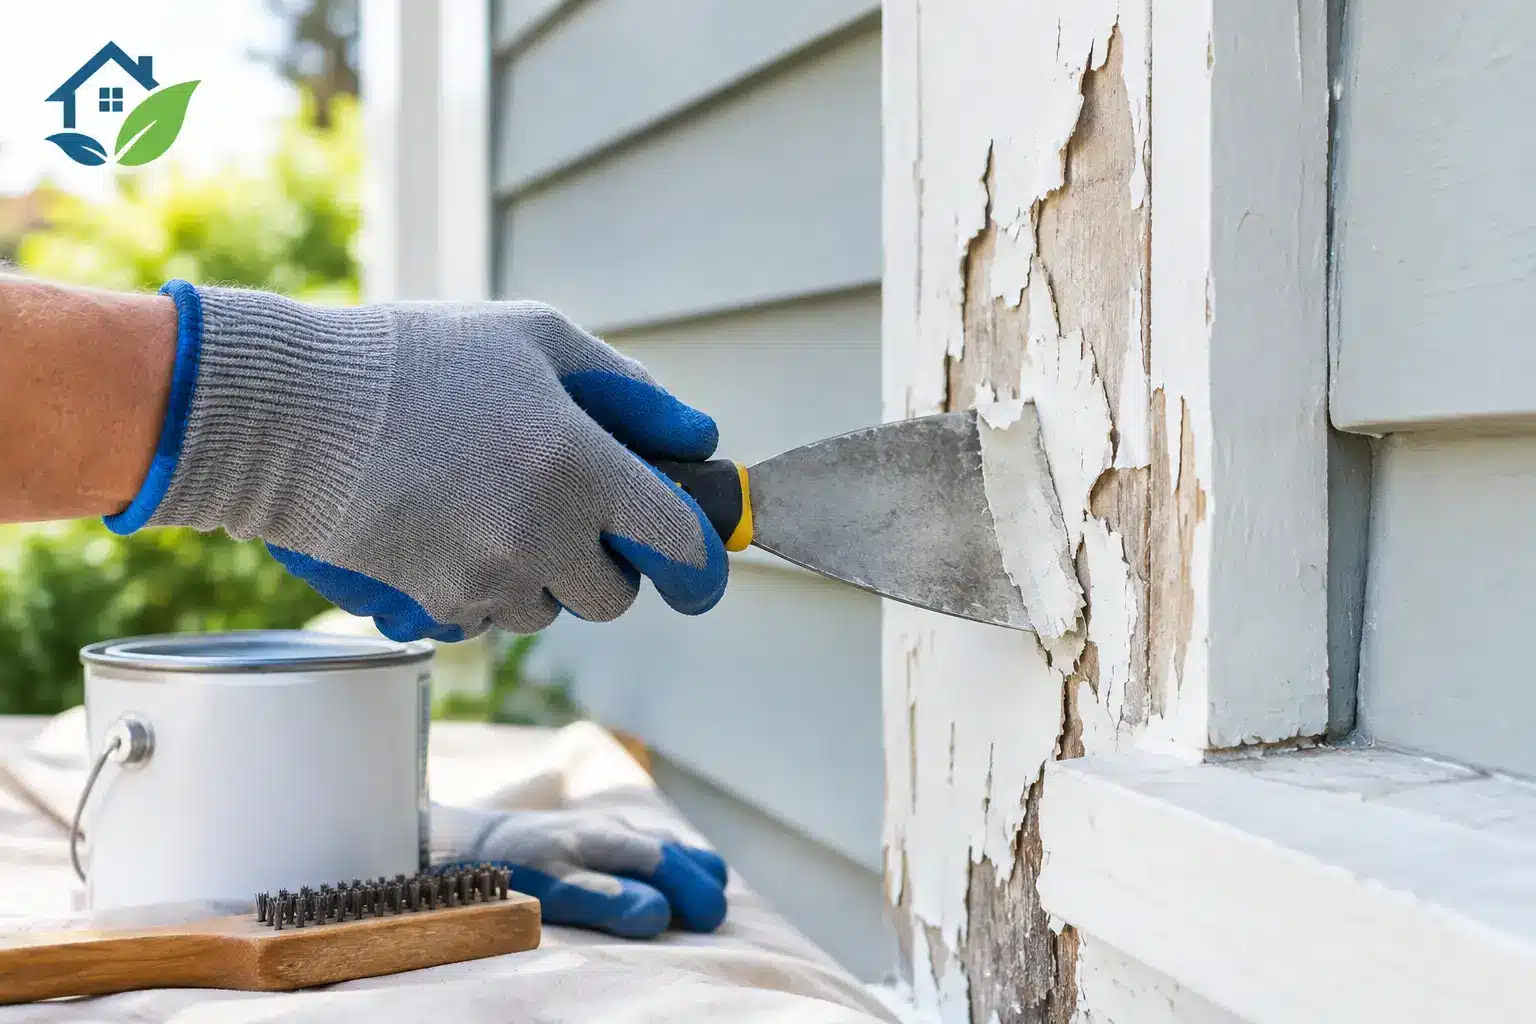
Use a paint scraper or stiff putty knife to lift peeling paint from the surface. Continue until the remaining paint is firmly adhered. Do not stop just because the obvious flakes are gone. If the scraper can easily slide under the edge of the surrounding paint, that coating is not sound enough to paint over.
For exterior wood, a pull scraper is often effective on broad areas, while a smaller scraper works around trim details. On drywall or plaster, use a lighter touch to avoid gouging the wall. If scraping exposes damaged drywall paper, it should be sealed before patching.
Sand the edges smooth
After scraping, sand the transition between the bare spot and intact paint. This step prevents the repair from showing as a raised outline after repainting. Start with a medium-grit abrasive for rough edges, then finish with a finer grit to feather the repair into the surrounding surface.
Be thorough without oversanding. Sanding sound paint down to bare material creates unnecessary work and can release more dust. The purpose is a smooth, stable edge, not a completely stripped surface.
Repair the surface beneath the paint
Paint cannot hide every defect. Small dents, nail holes, and shallow drywall damage can be filled with a quality patching compound, allowed to dry, and sanded smooth. Larger holes, cracked drywall seams, or areas damaged by water may need mesh tape, joint compound, replacement drywall, and texture matching.
Outside, inspect bare wood closely. Minor checks and small cracks can often be filled with an exterior-rated wood filler. Wood that is soft, crumbling, or significantly split should be replaced rather than filled. Caulk narrow gaps around trim joints and window or door frames, but do not caulk areas designed to drain water, such as siding laps.
Clean the repaired area after sanding. A vacuum and a damp microfiber cloth work well indoors. Exterior surfaces may need washing to remove dirt, chalking residue, mildew, and sanding dust. Allow all surfaces to dry fully before moving to primer.
Prime bare or repaired areas
Primer is what reconnects the repair to the finish coat. Apply it to exposed drywall, bare wood, patched areas, stained spots, and any surface where the old paint was removed. Choose primer based on the substrate and condition rather than grabbing whatever is left in the garage.
A stain-blocking primer is useful over water stains, tannins from certain woods, and smoke discoloration. Bare exterior wood often benefits from a high-quality exterior wood primer. Glossy surfaces may need a bonding primer after cleaning and scuff sanding. If you are changing from oil-based paint to water-based paint, proper surface preparation and a compatible primer are especially important.
Let the primer dry according to the product instructions. Rushing this stage can trap moisture or weaken adhesion, especially in cool or humid conditions.
Apply finish paint in thin, even coats
Use a finish paint designed for the room or exterior surface. Bathrooms and kitchens need coatings that tolerate moisture and frequent cleaning. Exterior siding, trim, doors, and masonry each benefit from products formulated for their specific exposure and material.
Apply two thin coats instead of one heavy coat. Heavy paint can sag, dry unevenly, and form a weaker film. Cut in around edges with a quality brush, then use the appropriate roller nap for walls, ceilings, siding, or textured surfaces. Maintain a wet edge so the new paint blends evenly with the surrounding area.
For a small wall repair, the fresh paint may still look different from the existing finish because paint fades over time. Spot painting is most successful when the color is recent and the original sheen is known. Otherwise, repainting the entire wall from corner to corner usually produces the cleanest result.
Common Mistakes That Cause Paint to Peel Again
The most common mistake is painting over a surface that is still damp or dirty. Even a high-quality coating cannot compensate for moisture behind the wall, mildew on siding, or loose chalking paint that was never removed.
Another issue is choosing the wrong sheen or product. Flat ceiling paint is not intended for a steamy shower area, and interior wall paint is not made to withstand Colorado sun and freeze-thaw cycles outdoors. Product selection matters as much as color.
Skipping primer can also shorten the life of a repair. Some modern paints advertise paint-and-primer performance, and they can work well over stable, previously painted surfaces. They are not a substitute for specialty primer over bare material, stains, repaired drywall, or difficult-to-adhere surfaces.
Finally, watch the weather when painting outdoors. Avoid applying exterior paint to wet surfaces, during rain, or when temperatures are outside the manufacturer’s recommended range. In Colorado, a sunny afternoon can still be followed by a cold night, so cure time matters as much as the temperature at application.
When a Professional Repair Makes Better Sense
Small areas of peeling paint are often manageable for a careful homeowner. A professional assessment is worthwhile when peeling affects multiple rooms, covers broad exterior areas, returns after previous repainting, or appears alongside rot, leaks, cracking drywall, or failing caulk.
It can also be the more efficient route for properties being prepared for sale or small commercial spaces that need a clean, dependable turnaround. A coordinated repair can include drywall patching, trim replacement, surface preparation, primer selection, and repainting without leaving you to coordinate several trades.
At Majestic Painting, the process starts with a clear walkthrough of what is failing and why. From there, homeowners can receive practical recommendations based on the condition of the property, the desired finish, and the budget for the work.
Peeling paint rarely improves on its own. Address it while the repair is still contained, and give the new coating a clean, dry, properly prepared surface to hold onto for years.