
A cabinet stain can make a dated kitchen feel warmer, richer, and more intentional without changing the layout. But learning how to stain kitchen cabinets starts with an honest assessment: stain highlights wood grain, color variation, and surface flaws. It does not cover them the way paint does. If your cabinets are solid wood or wood veneer in good condition, staining may be a great fit. If they are laminate, thermofoil, or heavily damaged, another refinishing approach will likely produce a better result.
Staining cabinets is also less forgiving than many homeowners expect. The preparation determines whether the finish looks even and durable or blotchy and worn within a few months. Take the time to identify the cabinet material, test your color, and plan for adequate drying time before taking doors apart.
Start by Identifying What Your Cabinets Are Made Of
Before choosing a stain color, inspect the cabinet doors, drawer fronts, face frames, and exposed end panels. Solid wood is the best candidate for staining because it absorbs color and can be sanded when needed. Oak, maple, cherry, birch, alder, and pine each accept stain differently, so the wood species matters as much as the stain itself.
Wood veneer can also be stained, but it requires a lighter touch. Veneer is a thin layer of real wood over a manufactured core. Sand through that top layer, and the repair can become much more complicated. Use a fine grit and avoid aggressive sanding on edges, corners, and raised profiles.
Laminate and thermofoil cabinets are not suitable for traditional stain. They are nonporous manufactured surfaces, so stain cannot soak in and create a natural wood finish. These cabinets can often be cleaned, repaired, primed, and painted, but staining is not the right process.
A simple check can help if you are unsure. Look at the door edges and the backside of a door. Solid wood typically shows continuous grain, while laminate may reveal a printed pattern or a plastic-like surface. If the construction is unclear, test an inconspicuous spot before committing to the project.
Choose a Stain That Works With the Existing Wood
The stain should enhance the wood you have, not fight it. A dark walnut stain can look refined on oak but may turn orange-toned pine muddy or make maple look uneven. Natural, golden oak, medium brown, and espresso tones all behave differently based on the original species and the cabinet’s existing finish.
Oil-based stains offer a longer working time, which can make them easier to wipe evenly across cabinet doors. They also have a stronger odor and generally take longer to dry. Water-based stains dry faster, have lower odor, and come in a broad range of colors, but the quicker dry time can make lap marks more likely if you work slowly.
Gel stain is worth considering when you want to deepen or alter the color without stripping every surface to bare wood. Because it sits more on the surface, it can be more controlled than penetrating stain. Still, it is not a shortcut for poor preparation, and it is not a reliable solution for laminate cabinets.
Always make a sample board using the same wood species and the same full process you plan to use: sanding, conditioner if needed, stain, and clear coat. A stain chip or photo cannot show how the product will look in your kitchen’s natural light and under its existing fixtures.
How to Stain Kitchen Cabinets: Prepare Every Surface
Preparation takes longer than staining, and that is normal. Start by removing cabinet doors, drawer fronts, hinges, knobs, and pulls. Label each door and its hardware with painter’s tape so everything returns to the right opening. Photograph the kitchen before disassembly if you need a quick reference later.
Protect countertops, floors, appliances, and nearby walls with drop cloths and masking materials. Set up a clean, dust-controlled workspace for doors and drawer fronts. A garage or covered work area can work well if temperatures are within the coating manufacturer’s recommended range and the space is protected from windblown dust.
Kitchen cabinets collect more than everyday dirt. Cooking grease, furniture polish, hand oils, and cleaning-product residue can prevent stain and clear coat from bonding properly. Clean every surface with a degreasing cleaner, then wipe away residue with clean water or the product’s recommended rinse method. Let the cabinets dry completely.
Next, determine whether you must remove the existing clear finish. Traditional penetrating stain needs access to bare wood. If your cabinets have a polyurethane, lacquer, varnish, or factory clear coat, simply scuff-sanding is not enough for stain to penetrate evenly. Strip or sand the finish until the wood is exposed.
For solid wood cabinets, begin with a grit appropriate to the condition of the surface, then finish with a finer grit such as 150 or 180. The goal is a smooth, consistent surface, not a polished one. Over-sanding can close the wood pores and limit stain absorption. On veneer, use fine sandpaper and minimal pressure.
Vacuum sanding dust from grooves and corners, then wipe surfaces with a clean microfiber cloth or tack cloth. Dust trapped under a clear coat is especially noticeable on cabinet doors, where light reflects across a broad, smooth face.
Condition, Stain, and Keep a Wet Edge
Some woods absorb stain unevenly, especially pine, birch, maple, and alder. A pre-stain wood conditioner can reduce blotching and give the final color a more consistent appearance. Follow the product directions closely because conditioner often has a specific window for applying stain.
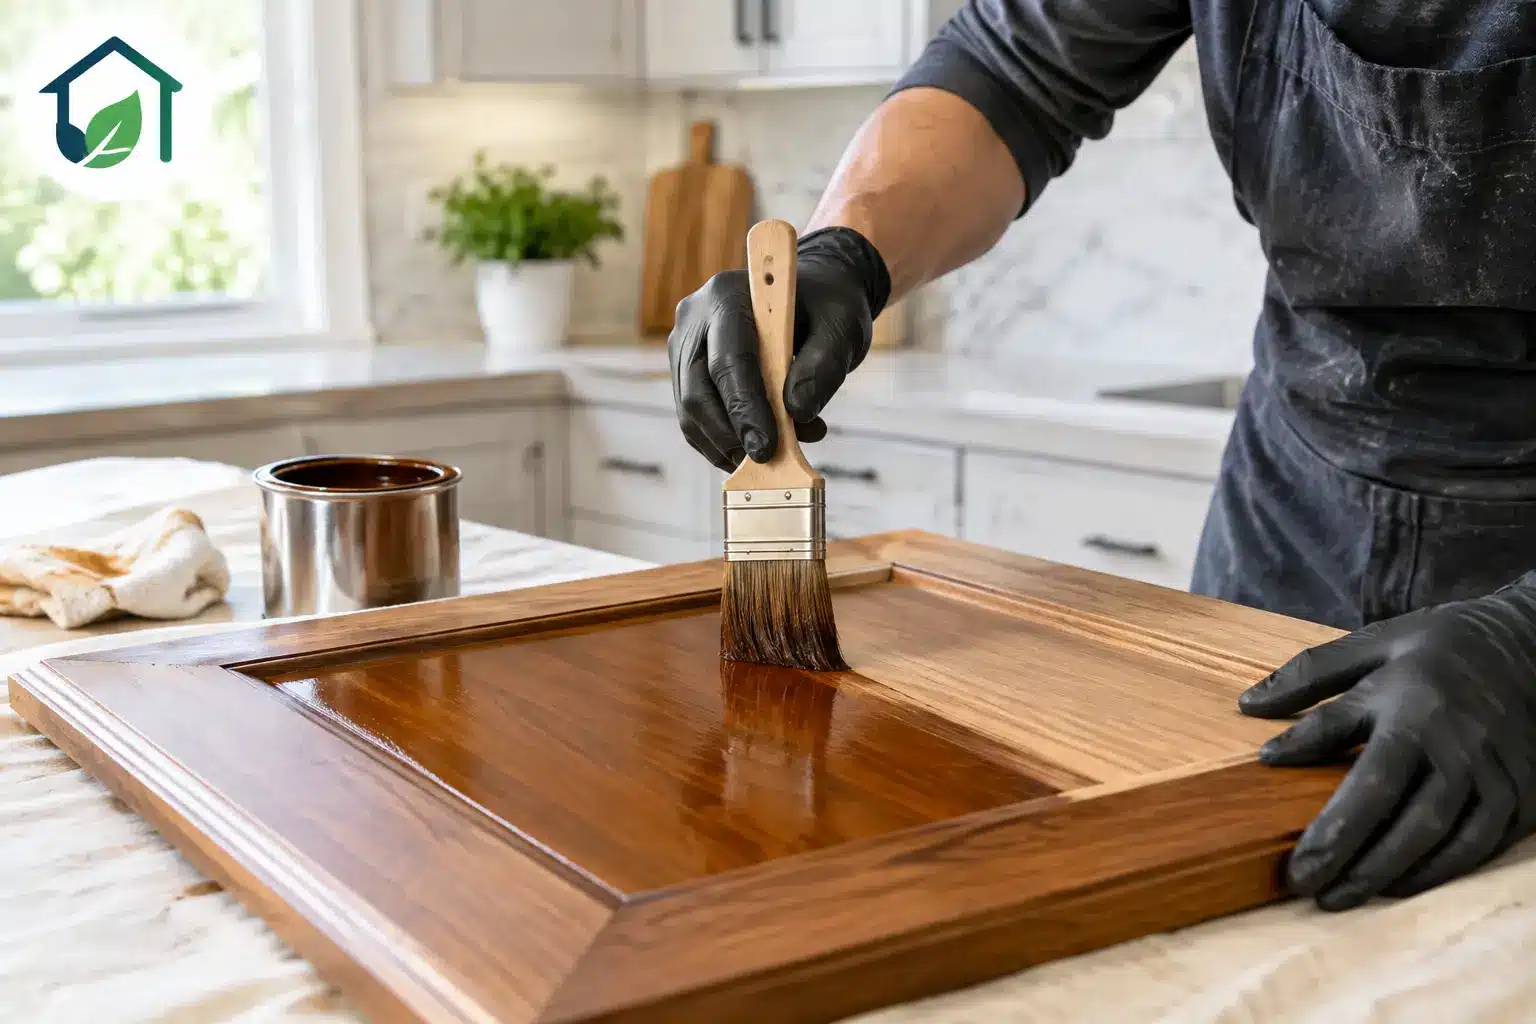
Apply stain in manageable sections, following the wood grain. Use a quality brush, staining pad, or lint-free cloth based on the stain manufacturer’s instructions. Allow the stain to sit only as long as directed, then wipe off excess with a clean cloth. Leaving extra stain on the surface does not always create a deeper or better color. It can leave sticky areas that dry unevenly and interfere with the topcoat.
Work one door at a time, and maintain a wet edge so you do not create visible overlap marks. For framed cabinet doors, stain detailed areas and recessed panels first, then move to rails and stiles. Check the door from multiple angles before setting it aside to dry.
One coat may be enough. Adding a second coat can deepen the color, but it can also reduce clarity in the grain. Let the first coat dry fully, assess it in the kitchen’s lighting, and decide based on the actual result rather than the color you expected from the can.
Protect the New Finish With a Clear Topcoat
Stain supplies color. The clear coat supplies the protection your cabinets need against water, cooking residue, fingerprints, and repeated cleaning. Skipping this step leaves stained wood vulnerable in the busiest room of the house.
For most kitchens, a durable cabinet-grade polyurethane or waterborne clear finish is the practical choice. Water-based products tend to remain clearer over time, while oil-based products can add a warmer amber cast. Satin is often a good middle ground: it is easier to maintain than flat finishes and less reflective than gloss.
Apply thin, even coats and allow proper drying time between them. Lightly sand between coats only if the product instructions call for it, using a very fine grit and removing all dust before recoating. Rushing recoat times is one of the easiest ways to create drag marks, cloudiness, or adhesion problems.
Even after the finish feels dry, it may not be fully cured. Reinstall hardware carefully, avoid harsh cleaners, and give the cabinets the curing period recommended by the coating manufacturer before putting them through normal kitchen use.
Know When Professional Refinishing Is the Better Value
A DIY stain project can make sense when cabinets are solid wood, the finish is simple, and you have time for careful preparation. It becomes more difficult when there are multiple layers of old finish, veneer repairs, water damage near the sink, detailed door profiles, or a tight deadline before listing a home.
Professional cabinet refinishing also helps when consistency matters across doors, frames, end panels, and trim. A contractor can identify whether the cabinets should be stripped, stained, glazed, or painted before work begins, rather than discovering a material problem halfway through the project. A clear written scope should spell out repairs, prep, products, color samples, timeline, and the finish system being used.
For Denver-area homeowners, dry indoor conditions and strong seasonal light can make color testing especially worthwhile. What looks like a soft medium brown under store lighting may read much darker beside your countertops or in afternoon sun.
A well-stained cabinet finish should look like the wood was meant to look that way, not like it was rushed into a new color. Start with a small sample, respect the prep work, and choose the path that gives your kitchen a finish you will be comfortable living with for years.